


Library Lab: ArtBots!
In our latest Library Lab program, kids in grades 3-5 made robots that draw by themselves. A few people asked for written instructions so they could make these ArtBots at home, so here is the method we used. We got the idea from the Mad Scientists Club at the Cheshire Public Library in Cheshire, CT. Thanks, Mad Scientists! You always do the coolest things.
Supplies:
Electric toothbrushes. We used the GB brand, purchased at our local Dollar Tree store.
Pool noodle. One pool noodle can make about 15 ArtBots.
Scissors
Markers
Pipe cleaners
Rubber bands
Batteries. The toothbrushes we used run on 1 AA battery, which is not included in the package.
Paper
Instructions:
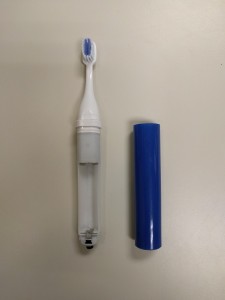
First you need to take apart your toothbrush. Remove the colored cover from the bottom of the brush to reveal the battery casement. You can set the colored cover aside. You won’t need it.
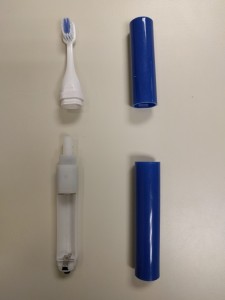 Separate the battery casement and motor from the toothbrush head. You can set the toothbrush head aside as well. In the picture to the right, you can see a toothbrush pulled apart into four pieces. The piece on the lower left is the one you want. This white battery casement and motor unit will provide the power to your ArtBot.
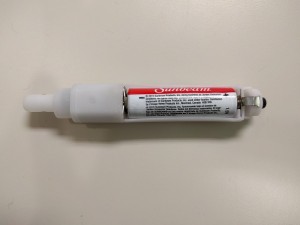 Put a battery in the casement and press the button on the bottom to make sure it works. The whole unit should vibrate when you turn it on.
Cut off a piece of pool noodle. We used sections that were about four inches long.
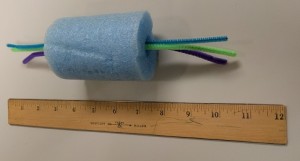 Insert the battery casement and motor into the hole in the middle of your pool noodle. You need to make it as snug as possible. The easiest way we found to do this was to put a few pipe cleaners through the center of the pool noodle before we inserted the toothbrush motor.
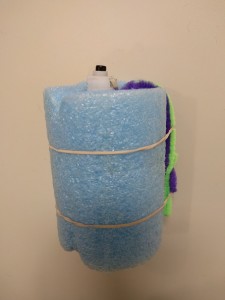 Twist the ends of the pipe cleaner together to secure them on the outside of the pool noodle. Wrap two rubber bands around the outside of the noodle and pipe cleaners.
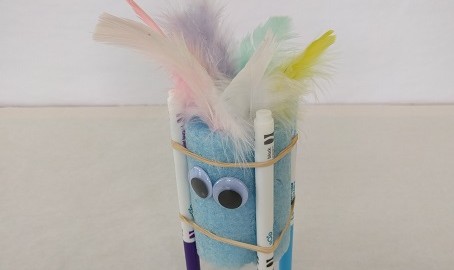
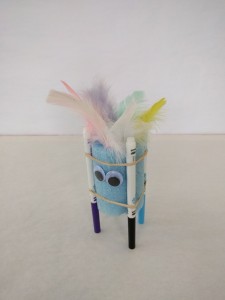 Slide markers under rubber bands. The markers will create the “legs” that your ArtBot walks on. We used four markers for each ArtBot, but you can use as many as you want as long as you have at least three.
We decorated our ArtBots with feathers and extra pipe cleaners. This is completely optional, but it was interesting to observe how decorations change the weight and balance of each robot, which in turn affects the way the robots move and draw. Some of the kids in our program attached bells to their robots, so they jingle as they move.
Finally, take the caps off the markers, stand your ArtBot on a piece of paper, press the button, and watch it draw!
ArtBot video!
The kids in our Library Lab program enjoyed experimenting with their ArtBots. What happens if you make one leg shorter or longer than the others? What happens if you use a mix of thin and broadline markers? What happens if you attach a weight to one side of your ArtBot? The possibilities are endless!
//